Bead Embroidery

The International Quilt Festival in Houston was amazing, as always. It’s so incredibly inspiring to see all of the quilts and quilt-related pieces that people have made. It was the 40th anniversary of the International Quilt Festival, and as part of the celebration they had a huge collection of red and white quilts on display.

IQF-Ruby-Jubilee-Red-and-Wh

The classes I took there were great, too. I learned how to do reverse appliqué by machine, how to work in a single colour to make small collage quilts, and how to sew with silk. I also got some great tips on getting more productive time in my sewing room.

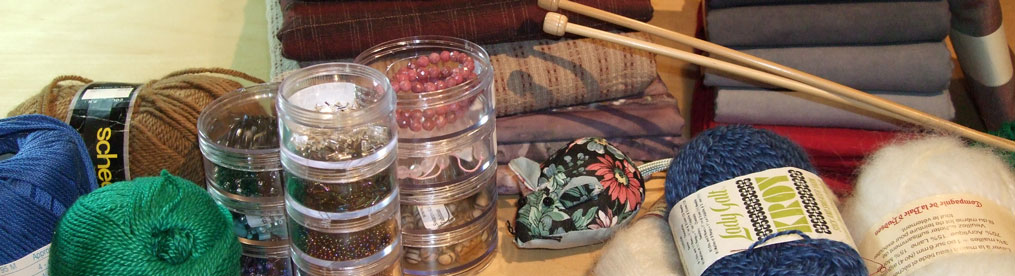
Since returning home, I have finally finished a little beading sampler that I started in a bead embroidery class in Houston 4 years ago. The class was taught by Nancy Eha, and was fun and informative. I came home with a partially completed sampler of beading stitches and techniques.

class-beading-sampler_002

I picked this up again last April, and started adding more beads. I have Nancy’s book, Bead Creative Art Quilts, to refer to, so I tried out a few more of the stitches and ideas in the book.

One of the techniques I learned in class was how to use bead embroidery to attach a cabochon to fabric. A cabochon is a stone with one flat side and no holes, so it has to be attached with plain or beaded stitching that circles the perimeter and tightens in as it is raised. I used this blue glass cab as the centre of a flower.

beaded-flower-with-cab_019

The squiggle in the middle of the sampler is a piece of rayon cord covered with beads. The cording is stitched to the fabric with a running stitch. Then the cord is covered with beads (page 27 in Nancy’s book). I was adding them in a fairly random fashion.

beaded-cording_006

I used a mixture of seed beads, bugle beads, and square beads.

beaded-cording-finished_025

We learned a number of ways to create dimension by stacking beads on top of each other. This wavy fence is made from bugle beads topped with loops of seed beads. They are attached to each other by having adjacent circles share a bead.

beaded-waving-fence_020

Here is a flower stitched with a grid of bugle beads and some seed beads. This photo also shows a few of the other bits of beading that we learned in class.

beaded-bugle-bead-flower_03

I stitched a snowflake using seed beads and thread (page 67) and sewed it onto the sampler.

beaded-snowflake_015

I thought that the beaded cord looked like a flower stem, so I stitched a few little curlicues branching off of it.

beading-sampler-progress_03

Of course, the flower stem needed a flower. I didn’t have much luck trying to sew one free-hand, so I drew one out on a piece of Golden Threads paper, pinned it to the fabric, and stitched over that.

beaded-flower-in-progress_0

It worked pretty well, although I found the paper a little bit hard to remove once the beading was finished.

beaded-flower-finished_043

At this point, I decided that there was enough beading, but there was some empty space that needed something in it.

beading-completed_045

I recently bought a couple of books on embroidery, one of which is The Stitches of Creative Embroidery by Jacqueline Enthoven. I thought that this piece was a great chance to try out a few stitches. There’s a whole section in the book on the chain stitch and different ways to use it (starting on page 121). This little fern is made from the basic chain stitch. A few straight stitches and French knots fill in the swirls.

embroidered-fern_054

I used chain stitch to surround the petals of my large beaded flower, too.

chain-stitching-around-flower

A single chain stitch (or Lazy Daisy stitch) makes nice tulips (page 127), as well as leaves.

embroidered-tulip_058

Some single chain stitches in lines of feather stitch makes grass (page 108).

embroidered-grass_056

All of the bead embroidery was done on fabric basted to a piece of batting. I added a backing fabric after the beading was finished. To hold the three layers together I quilted the sampler with curved lines of long running stitches using two strands of embroidery floss. I marked the lines first with a chalk pencil. When the quilting was finished, I trimmed off the excess backing and batting.

beading-sampler-before-facing

I decided to try a new-to-me method of finishing the edges of this piece. A long time ago I downloaded a free e-book from the Quilting Daily website that included a tutorial on using a facing to finish the edges of an art quilt (located here). The facing folds to the back of the quilt, with mitred corners and hand stitching along the edges to hold it down.

beading-sampler-facing_072

And at last, here is the finished sampler:

beading-sampler_068c

(as usual, click on the photos to enlarge them)

Little Red Fish

I’m going to the International Quilt Festival in Houston again this fall, and I’ve signed up for a couple of classes there. Going through this year’s class listings, I started thinking about the classes I’ve taken there in the past. I have some partly finished projects from those classes, and it seems like a good idea to dig those out and finish them. I have a bad habit of bringing things home from classes and putting them away, adding them to the stack of UFOs hidden in the closet.

This one is from two years ago. I took a class with Judith Baker Montano to learn how to make an under-the-sea piece using fabric and embroidery and various other embellishments. I’d done quite a lot there, but had not had enough time to finish it in class. I got out the partly finished piece and all of the materials from the class kit. Most of the background was done, and I decided that all I really needed to do to finish it was to add some embroidery and beading to the foreground.

This picture shows the work in progress, with some newly added embroidery. I’m not very experienced at embroidery, which made it hard to decide what to do. I followed some of the stitches in Judith Baker Montano’s book, Elegant Stitches. I definitely want to get more practice with embroidery, so that I have some experience to draw on when working on something like this.

Under-the-sea_08c

Originally the piece was supposed to end up being 7” by 10”, but I decided I’d make it smaller so it could become a page in my sketchbook of small quilts. I used a piece of card stock with a window cut into it to see how it would look trimmed down. 

Under-the-sea_04c

At this stage, it looked almost finished to me, but I thought it needed a focal point, so I added a bigger red fish to the foreground. I also added a few beads to the orange brain coral, and a bit more ribbon embroidery. Here’s a close-up of it, after I trimmed off some of the excess canvas.

Under-the-sea_28c

To finish the embroidered piece, I first hand-basted the edges through all of the layers of fabric. Then I used a small zigzag stitch to attach a length of textured yarn all the way around.

Under-the-sea_34c

Here it is, all ready to mount on a quilted background.

Under-the-sea_36c

The final task was to make the quilted 8” by 8” page to mount it on. I chose some batik fabric for the front that I thought looked a bit watery.

Under-the-sea_37c

For the back, I used a piece of batik that had shells and other sea critters on it. I layered the two fabrics with batting in between, and quilted around the shells, filling the spaces in between with some free-motion doodles. This is a fun way to get in some free-motion practice. Next, I used a couple of rounds of zigzag stitching to finish off the edges.

Under-the-sea_40c

I mounted the embroidery piece on the quilted page with a straight line of machine stitching, and finished off by adding the grommets so I could add it to my sketchbook. Here it is, all finished.

Under-the-sea_44c

I have a couple more class pieces I’d like to finish off before the end of October rolls around. I’ll post them here when they’re done.

Homespun 16-Patch Quilt

I’m still hand-stitching the back of the binding on my Sampler Quilt, so I don’t have a photo yet of the completed quilt to share with you. Instead, I thought I’d show you my latest quilt project.

finished 16-patch top

I had 16 fat-quarters of homespun fabric in my stash that were waiting for the right idea for a quilt. It dawned on me that the obvious thing was to sew up 16-patch blocks, with one square of each fabric. I thought it would look nice alternating those blocks with solid squares of fabric. Because the homespun fabrics are fairly busy, I decided to make all of the 16-patch blocks the same. That also made it easier to piece them.

A little bit of math and sketching later, and I settled on blocks of 6” square, finished size. I was able to sew 40 of the 16-patch blocks, and had 48 solid blocks of fabric, which gave me a finished quilt top of 48” by 60” with a few solid blocks left over.

What follows is a quick step-by-step description of how I made this quilt top.

First, I cut the fat quarters into 4 strips 2” wide, and three squares 6 1/2” by 6 1/2”

cutting fat quarters

Next, I took one 6” square of each fabric and used them to try out different arrangements of the fabrics. I was trying for a layout that broke up lights and darks without looking too much like a checker-board. This is what I settled on:

Fabric layout

Using that layout as a guide, I started to sew the 16-patch blocks. First, I sewed the strips together into 4 strip sets, each one corresponding to a row in the 16-patch block.

sewing strips together

Then I cross-cut the strip sets into 2” wide strips

cutting strip sets

and sewed those together to make 16-patch blocks

sewing 16-patch rows

sewing 16-patch blocks

and here is a finished 16-patch block, front and back.

16-patch front

the back view shows how I pressed the seams.

16-patch back

For the layout of the quilt, I decided to put the solid fabric blocks in the same order as the fabrics in the 16-patch blocks. I think this gave it a more organized look than it would have had if I’d placed them randomly. The fabric is busy enough, so this layout tones down that busyness.

finished 16-patch top

I’ve bought some more homespun fabric to add a 3 inch wide border around the quilt top. I want the border to frame it and to make the quilt a bit bigger. And then it will be on to layering and quilting.